> ## Documentation Index
> Fetch the complete documentation index at: https://codegeninc-codegen-bot-sdk-docs-2-0.mintlify.site/llms.txt
> Use this file to discover all available pages before exploring further.
# Using Codegen in Your IDE
Get up and running with Codegen programs in IDEs like VSCode, Cursor and PyCharm.
Make sure to [install and initialize](/introduction/installation) Codegen with `codegen init`
## Configuring your IDE Interpreter
Codegen creates a custom Python environment in `.codegen/.venv`. Configure your IDE to use this environment for the best development experience.
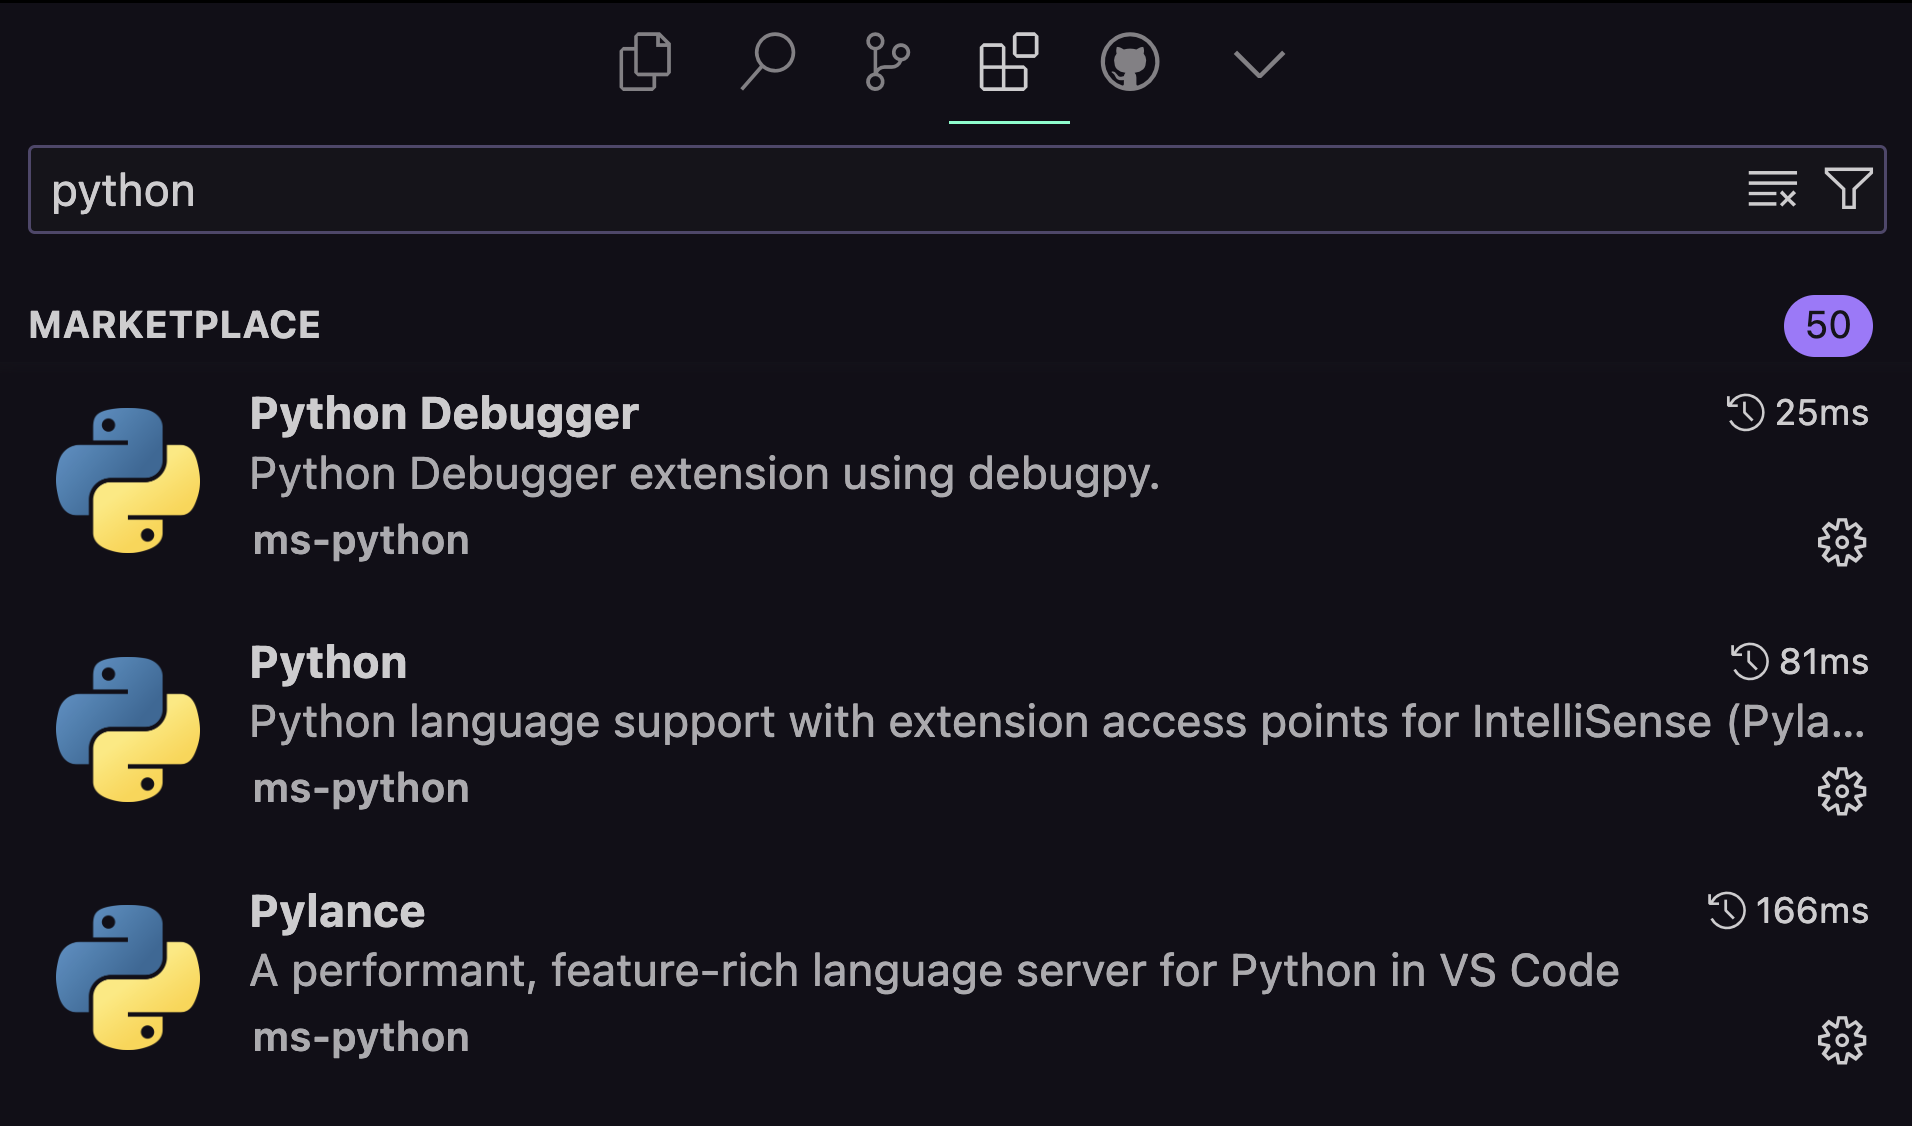
1. Install the VSCode Python Extensions for LSP and debugging support. We recommend Python, Pylance and Python Debugger for the best experience.
 2. Open the Command Palette (Cmd/Ctrl + Shift + P)
3. Type "Python: Select Interpreter"
2. Open the Command Palette (Cmd/Ctrl + Shift + P)
3. Type "Python: Select Interpreter"
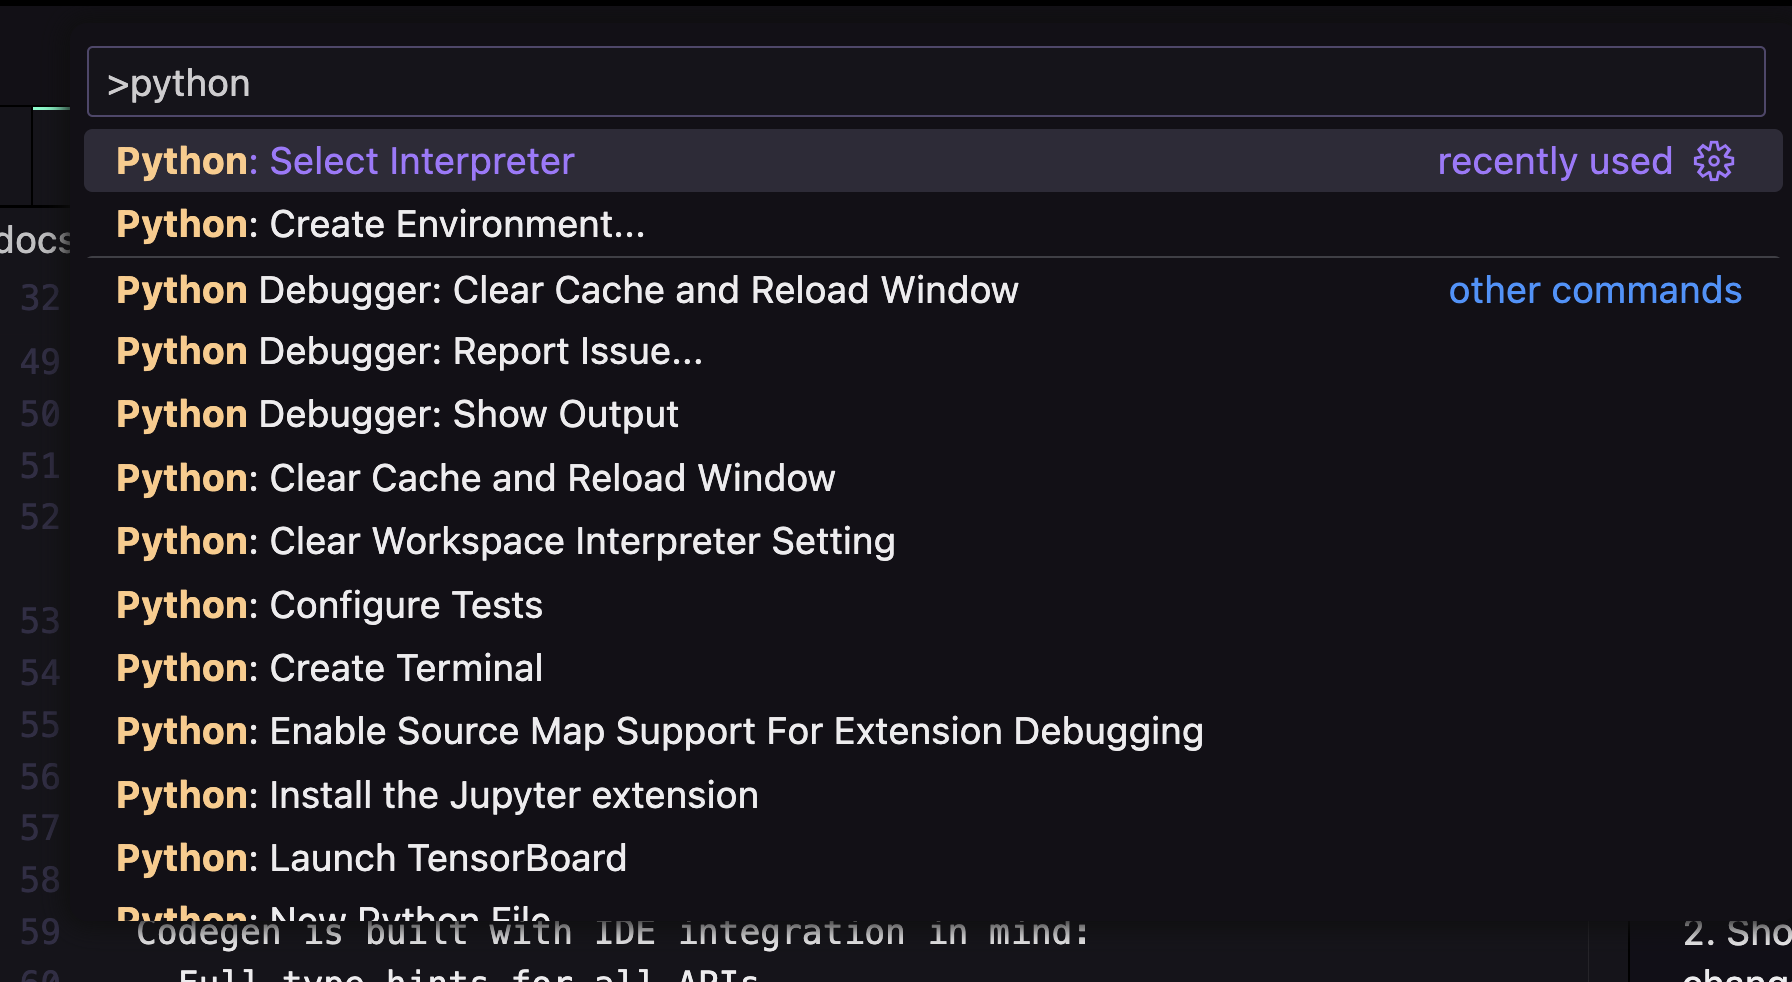 4. Choose "Enter interpreter path"
5. Navigate to and select:
```bash
.codegen/.venv/bin/python
```
Alternatively, create a `.vscode/settings.json`:
```json
{
"python.defaultInterpreterPath": "${workspaceFolder}/.codegen/.venv/bin/python",
"python.analysis.extraPaths": [
"${workspaceFolder}/.codegen/.venv/lib/python3.12/site-packages"
]
}
```
1. Open PyCharm Settings/Preferences
2. Navigate to "Project > Python Interpreter"
3. Click the gear icon ⚙️ and select "Add"
4. Choose "Existing Environment"
5. Set interpreter path to:
```bash
.codegen/.venv/bin/python
```
## MCP Server Setup
This is an optional step but highly recommended if your IDE supports MCP support and you use AI Agents.
The MCP server is a local server that allows your AI Agent to interact with the Codegen specific tools,
it will allow an agent to:
* ask an expert to create a codemod
* improve a codemod
* get setup instructions
### IDE Configuration
#### Cline
Add this to your cline\_mcp\_settings.json:
```json
{
"mcpServers": {
"codegen-cli": {
"command": "uv",
"args": [
"--directory",
"/codegen-sdk/src/codegen/cli/mcp",
"run",
"server.py"
]
}
}
}
```
#### Cursor:
Under the `Settings` > `Feature` > `MCP Servers` section, click "Add New MCP Server" and add the following:
```
Name: codegen-mcp
Type: Command
Command: uv --directory /codegen-sdk/src/codegen/cli/mcp run server.py
```
## Index Codegen Docs
#### Cursor:
If you use Cursor you'll be able to configure the IDE to index the Codegen docs. To do so go to `Settings` > `Features` > `Docs`
and then click on `Add new docs`. We recommend using this url to index the API reference:
```
https://docs.codegen.com/api-reference/index
```
## Create a New Codemod
Generate the boilerplate for a new code manipulation program using [codegen create](/cli/create):
```bash
codegen create organize-types \
-d "Move all TypeScript types to \
into a centralized types.ts file"
```
Passing in `-d --description` will get an LLM expert to compose an initial version for you. This requires a Github account registered on [codegen.sh](https://codegen.sh)
This will:
1. Create a new codemod in `.codegen/codemods/organize_types/`
2. Generate a custom `system-prompt.txt` based on your task
3. Set up the basic structure for your program
The generated codemod includes type hints and docstrings, making it easy to get IDE autocompletion and documentation.
## Iterating with Chat Assistants
When you do `codegen init`, you will receive a [system prompt optimized for AI consumption](/introduction/work-with-ai) at `.codegen/codegen-system-prompt.txt`.
If you reference this file in "chat" sessions with Copilot, Cursor, Cody, etc., the assistant will become fluent in Codegen.
4. Choose "Enter interpreter path"
5. Navigate to and select:
```bash
.codegen/.venv/bin/python
```
Alternatively, create a `.vscode/settings.json`:
```json
{
"python.defaultInterpreterPath": "${workspaceFolder}/.codegen/.venv/bin/python",
"python.analysis.extraPaths": [
"${workspaceFolder}/.codegen/.venv/lib/python3.12/site-packages"
]
}
```
1. Open PyCharm Settings/Preferences
2. Navigate to "Project > Python Interpreter"
3. Click the gear icon ⚙️ and select "Add"
4. Choose "Existing Environment"
5. Set interpreter path to:
```bash
.codegen/.venv/bin/python
```
## MCP Server Setup
This is an optional step but highly recommended if your IDE supports MCP support and you use AI Agents.
The MCP server is a local server that allows your AI Agent to interact with the Codegen specific tools,
it will allow an agent to:
* ask an expert to create a codemod
* improve a codemod
* get setup instructions
### IDE Configuration
#### Cline
Add this to your cline\_mcp\_settings.json:
```json
{
"mcpServers": {
"codegen-cli": {
"command": "uv",
"args": [
"--directory",
"/codegen-sdk/src/codegen/cli/mcp",
"run",
"server.py"
]
}
}
}
```
#### Cursor:
Under the `Settings` > `Feature` > `MCP Servers` section, click "Add New MCP Server" and add the following:
```
Name: codegen-mcp
Type: Command
Command: uv --directory /codegen-sdk/src/codegen/cli/mcp run server.py
```
## Index Codegen Docs
#### Cursor:
If you use Cursor you'll be able to configure the IDE to index the Codegen docs. To do so go to `Settings` > `Features` > `Docs`
and then click on `Add new docs`. We recommend using this url to index the API reference:
```
https://docs.codegen.com/api-reference/index
```
## Create a New Codemod
Generate the boilerplate for a new code manipulation program using [codegen create](/cli/create):
```bash
codegen create organize-types \
-d "Move all TypeScript types to \
into a centralized types.ts file"
```
Passing in `-d --description` will get an LLM expert to compose an initial version for you. This requires a Github account registered on [codegen.sh](https://codegen.sh)
This will:
1. Create a new codemod in `.codegen/codemods/organize_types/`
2. Generate a custom `system-prompt.txt` based on your task
3. Set up the basic structure for your program
The generated codemod includes type hints and docstrings, making it easy to get IDE autocompletion and documentation.
## Iterating with Chat Assistants
When you do `codegen init`, you will receive a [system prompt optimized for AI consumption](/introduction/work-with-ai) at `.codegen/codegen-system-prompt.txt`.
If you reference this file in "chat" sessions with Copilot, Cursor, Cody, etc., the assistant will become fluent in Codegen.
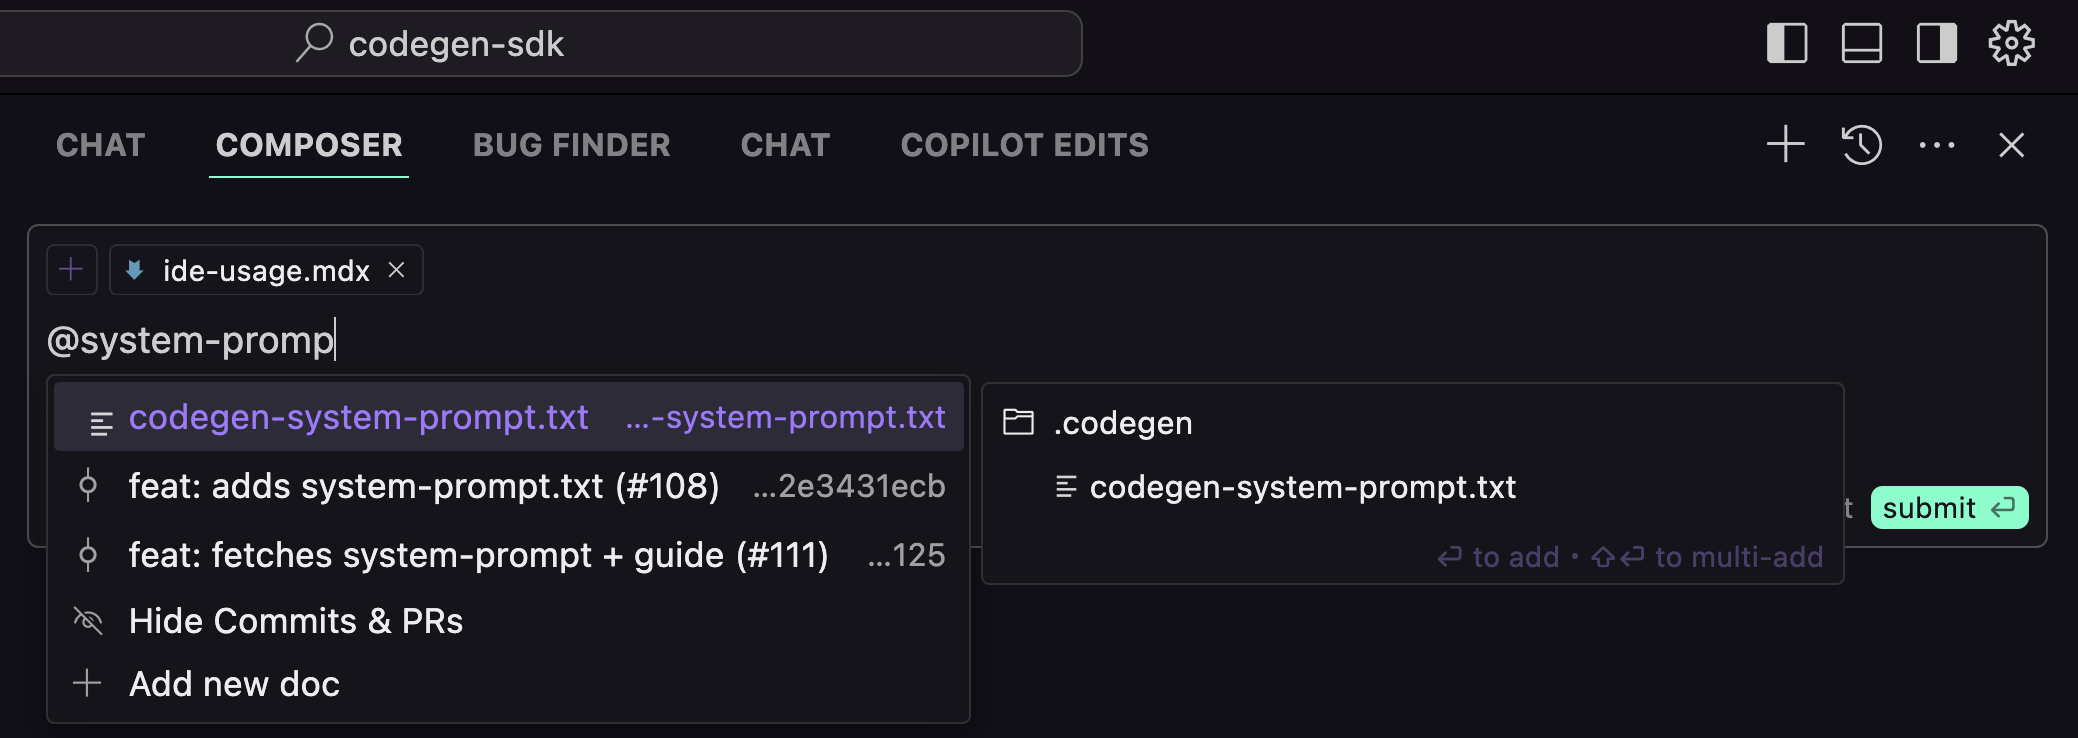 Collaborating with Cursor's assistant and the Codegen system prompt
In addition, when you [create](/cli/create) a codemod with "-d", Codegen generates an optimized system prompt in `.codegen/codemods/{name}/{name}-system-prompt.txt`. This prompt contains:
* Relevant Codegen API documentation
* Examples of relevant transformations
* Context about your specific task
You can also drag and drop the system prompt ([available here](/introduction/work-with-ai))file directly into chat windows like ChatGPT or Claude for standalone help.
## Running and Testing Codemods
```bash
# Run => write changes to disk
codegen run organize-types
# Reset changes on disk
codegen reset
```
You can also run the program directly via `.codegen/.venv/bin/python path/to/codemod.py` or via your editor's debugger
## Viewing Changes
We recommend viewing changes in your IDE's native diff editor.
## What's Next
See real-world examples of codemods in action.
Learn about Codegen's core concepts and features
Collaborating with Cursor's assistant and the Codegen system prompt
In addition, when you [create](/cli/create) a codemod with "-d", Codegen generates an optimized system prompt in `.codegen/codemods/{name}/{name}-system-prompt.txt`. This prompt contains:
* Relevant Codegen API documentation
* Examples of relevant transformations
* Context about your specific task
You can also drag and drop the system prompt ([available here](/introduction/work-with-ai))file directly into chat windows like ChatGPT or Claude for standalone help.
## Running and Testing Codemods
```bash
# Run => write changes to disk
codegen run organize-types
# Reset changes on disk
codegen reset
```
You can also run the program directly via `.codegen/.venv/bin/python path/to/codemod.py` or via your editor's debugger
## Viewing Changes
We recommend viewing changes in your IDE's native diff editor.
## What's Next
See real-world examples of codemods in action.
Learn about Codegen's core concepts and features